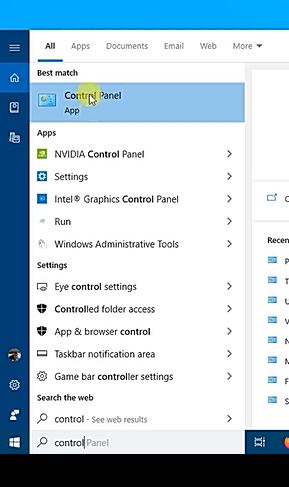
1. In Windows 10, use search to find Control Panel and click on it from the search results.
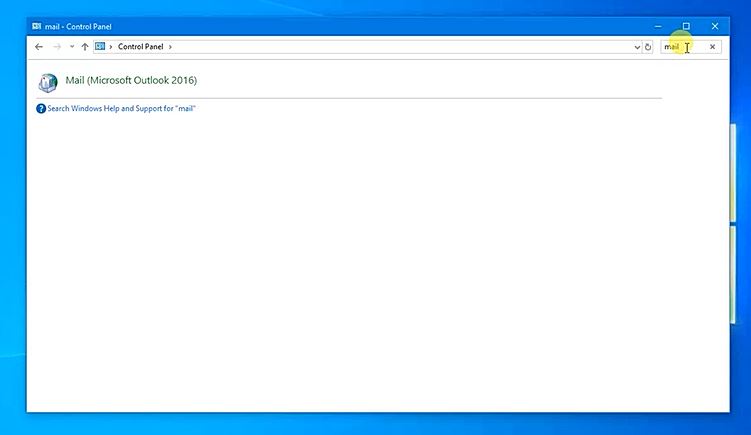
2. Once Control Panel is open, search for "mail" in the Control Panel search box in the upper right corner. Click on Mail (Microsoft Outlook...). Your version may be different, but it will resemble this screen capture.
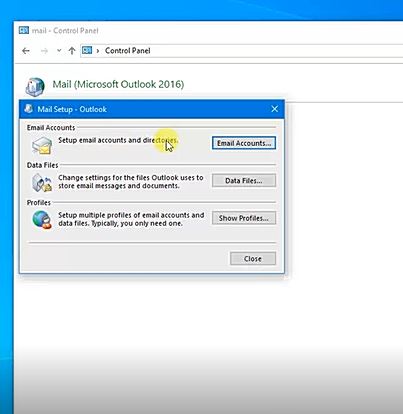
3. Click on the Email Accounts button.
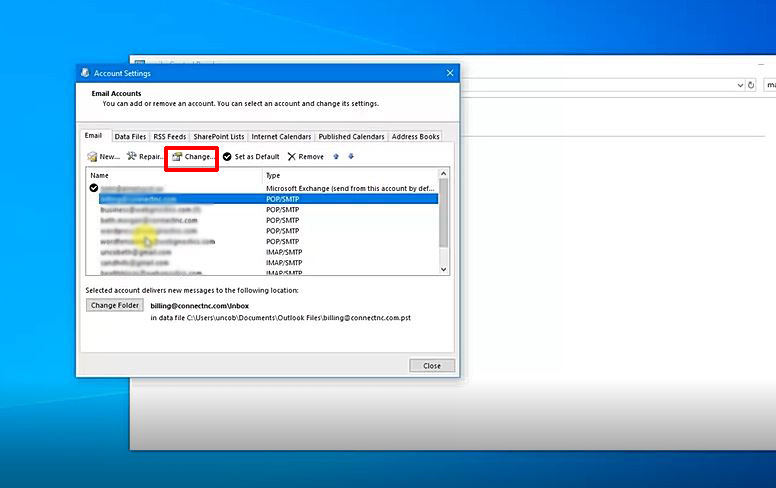
4. Now click on the email account you want to change and click the Change button.
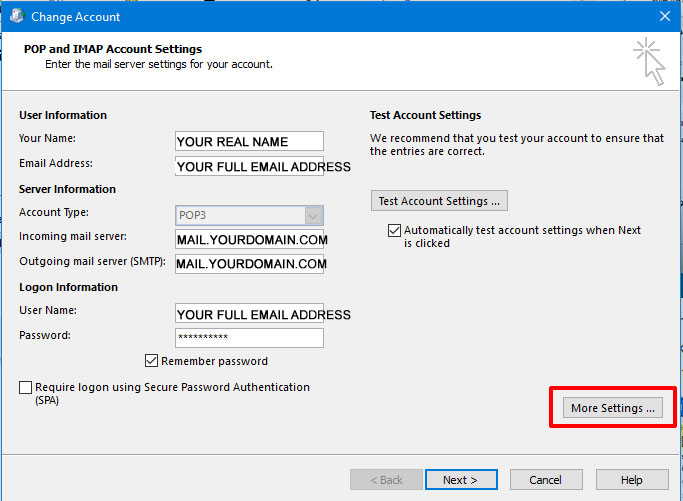
5. After this, you can view the basic settings for your mail account. This is where you would check to make sure your mail server host names and your email address and password are correctly typed. You can click on More Settings to see the advanced settings. You can't change an account from IMAP to POP or POP to IMAP here.
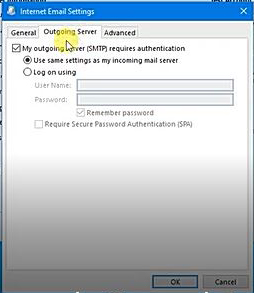
6. After you click on More Settings, you can click on the Outgoing Server tab to make sure Outlook is using authentication for outbound mail. This is required for all email accounts at ConnectNC.
7. When you click on the Advanced tab, you can change port numbers and authentication types.
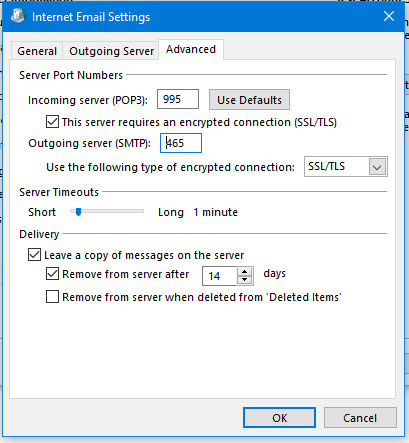
If, for any reason, the default ports are not working for you, you can choose from these for each type of connection.
Incoming Mail (POP) Ports
110 (Make sure to uncheck "This server requires an encrypted connection.")
995
Incoming Mail (IMAP) Ports
143 (Make sure to change SSL/TLS to None.)
993
Outgoing Mail (SMTP) Ports
25
465
587
Be sure to save your changes!
We can remote in to help you make these changes. Please contact us here to get started: https://connectnc.com/clients/submitticket.php?step=2&deptid=5
